Glass skin doesn’t have to cost a fortune, and my client is proof. She invested just $50 in a carefully selected K-Beauty routine, stayed consistent for six weeks, and the transformation was honestly unreal—brighter tone, smoother texture, visibly smaller pores, and that lit-from-within glow everyone chases.
Instead of trendy splurges, we focused on barrier repair, deep hydration, and proven Korean skincare ingredients like snail mucin, centella asiatica, and niacinamide to target dullness and uneven skin. This breakdown shares the exact budget K-Beauty products she used, how we layered them morning and night, and why this affordable glass skin routine delivered results that rival high-end skincare.
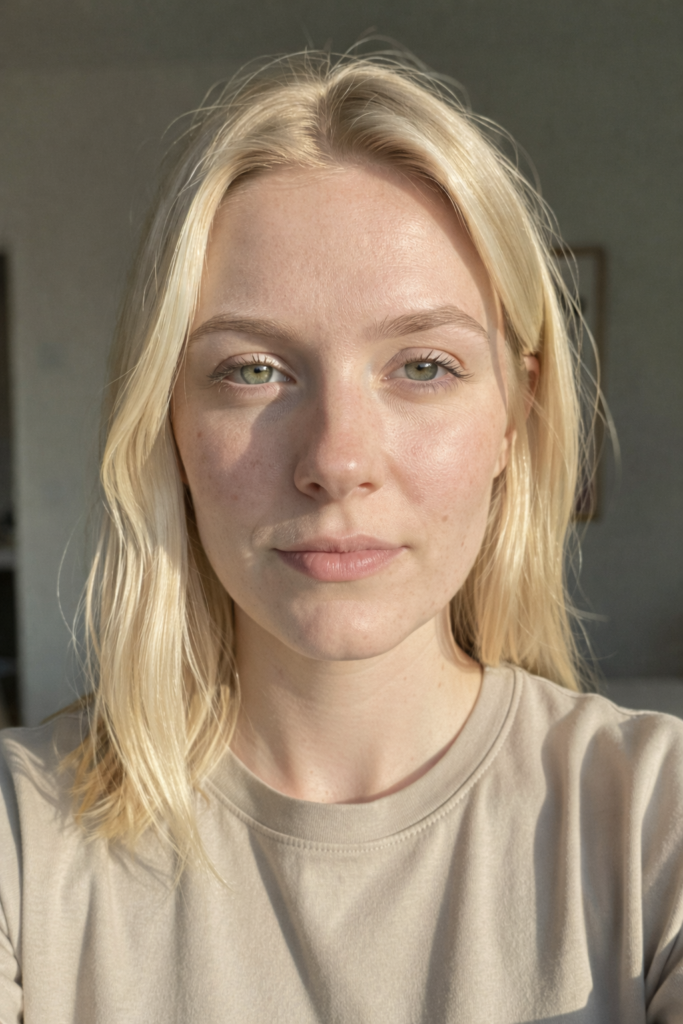
Also added the results to the end so that you can see the difference yourself.
Disclaimer
“This Blog is completely reader-supported, for any purchase you make from affiliate links on this blog we earn a small commission with no extra cost to you, This content is for informational purposes and not medical advice.”
The Exact $50 K-Beauty Routine She Used for 6 Weeks
The exact $50 K-Beauty routine she followed for six consistent weeks was simple, strategic, and built entirely around skin barrier repair and long-lasting hydration. You start with a low-pH gel cleanser to remove sunscreen and buildup without stripping, then go in with a hydrating toner layered twice using the pat-and-press method to increase absorption instead of wasting product on cotton pads.
A snail mucin essence seals in water and supports repair, followed by a lightweight serum formulated with niacinamide to visibly refine pores and even out tone. At night, you repeat the hydration layers and lock everything in with a ceramide-based moisturizer to strengthen the barrier and prevent transepidermal water loss.
Twice a week, you swap the serum step for a mild chemical exfoliant to smooth texture without triggering irritation. You’re not chasing trends here—you’re focusing on consistency, correct layering order, and ingredients that actually work together, which is exactly how her skin went from dull and uneven to visibly plump, clear, and glassy in just six weeks.
Full Product List with Prices and Budget Breakdown
You’re not throwing $50 at random “viral” products—you’re building a routine that makes sense. About $9 goes to a gentle low-pH cleanser because if your face feels tight after washing, everything else is already compromised. Around $12 is spent on a hydrating toner you can layer twice with your hands to instantly bring life back into dull skin.
You invest roughly $11 in a snail mucin essence because that’s what helped calm irritation and slowly smooth out uneven texture. Another $9 goes into a niacinamide serum to keep oil in check and make pores look cleaner and tighter over time. The last $9–$10 secures a ceramide-based moisturizer so all that hydration doesn’t just evaporate overnight.
Nothing overlaps, nothing is trendy for the sake of it—each product has a job, and together they create the kind of steady, visible improvement that made her six-week results look way more expensive than $50.
The exact products she used:

HARUHARU wonder Black Rice Moisture 5.5 Soft Cleansing Gel

haruharu Wonder Black Rice Hyaluronic Toner

Snail Mucin Power Repairing Essence

The Ordinary Niacinamide 10% + Zinc 1%

Vanicream Daily Facial Moisturizer With Ceramides and Hyaluronic Acid
Morning and Night Layering Order for Maximum Glow
Your glow doesn’t come from piling on products—it comes from layering them in the right order so your skin actually absorbs what you’re paying for. In the morning, you start with a gentle cleanse to remove overnight oil without stripping, then press in a hydrating toner while your skin is still slightly damp to maximize water retention.
Follow with snail mucin essence and give it a full 30–60 seconds to settle; this step is where plumpness begins to build. Next, apply your niacinamide serum in a thin, even layer—don’t rub aggressively, just smooth and press—so it can regulate oil and refine pores throughout the day. Seal everything with a ceramide-based moisturizer to lock in hydration, and always finish with sunscreen because unprotected UV exposure will undo every bit of progress.
At night, repeat the cleanse, layer toner the same way, apply essence, and either use your niacinamide again or swap in a mild chemical exfoliant twice a week before moisturizing to smooth texture safely. You’re not rushing through steps—you’re giving each layer a moment to absorb, which is exactly why her skin looked brighter, calmer, and visibly more glass-like by week six.
Barrier Repair Strategy That Transformed Her Texture
Her texture didn’t change because we added more actives—it changed because you stopped stressing the skin barrier and started rebuilding it properly. You cut out harsh scrubs and high-percentage acids and focused on replenishing what your skin was clearly lacking: lipids, hydration, and calm.
A ceramide-based moisturizer became non-negotiable twice daily, applied to slightly damp skin to reduce transepidermal water loss. Snail mucin was layered consistently to support repair and improve elasticity, while niacinamide stayed in the routine at a balanced concentration to regulate oil without triggering irritation. Exfoliation was limited to twice a week with a mild chemical formula, just enough to smooth without compromising barrier integrity.
Within two weeks, redness started settling; by week four, rough patches softened; by week six, that uneven, bumpy texture looked visibly refined. You weren’t chasing instant brightness—you were restoring function first, and that’s exactly why the glow looked healthy instead of artificial.
Ingredient Focus: Snail Mucin, Centella, and Niacinamide
These three ingredients carried the entire routine, and once you understand what each one actually does, the six-week transformation makes sense.
Snail mucin wasn’t just a trend step—it helped support skin repair, improve elasticity, and gradually soften post-acne marks by keeping hydration levels steady throughout the day. Centella asiatica stepped in to calm inflammation and reduce visible redness, especially during the first two weeks when the barrier was still stabilizing. Niacinamide worked quietly in the background, regulating excess oil, refining the look of enlarged pores, and strengthening barrier function without the irritation you’d get from stronger actives.
You weren’t overloading your skin with aggressive treatments—you were giving it ingredients that communicate with the skin rather than fight it. Used consistently and layered correctly, this combination addressed dullness, uneven tone, and rough texture at the root level, which is exactly why her glow looked smooth, balanced, and believable instead of overly polished or temporary.
Week-by-Week Skin Progress Timeline
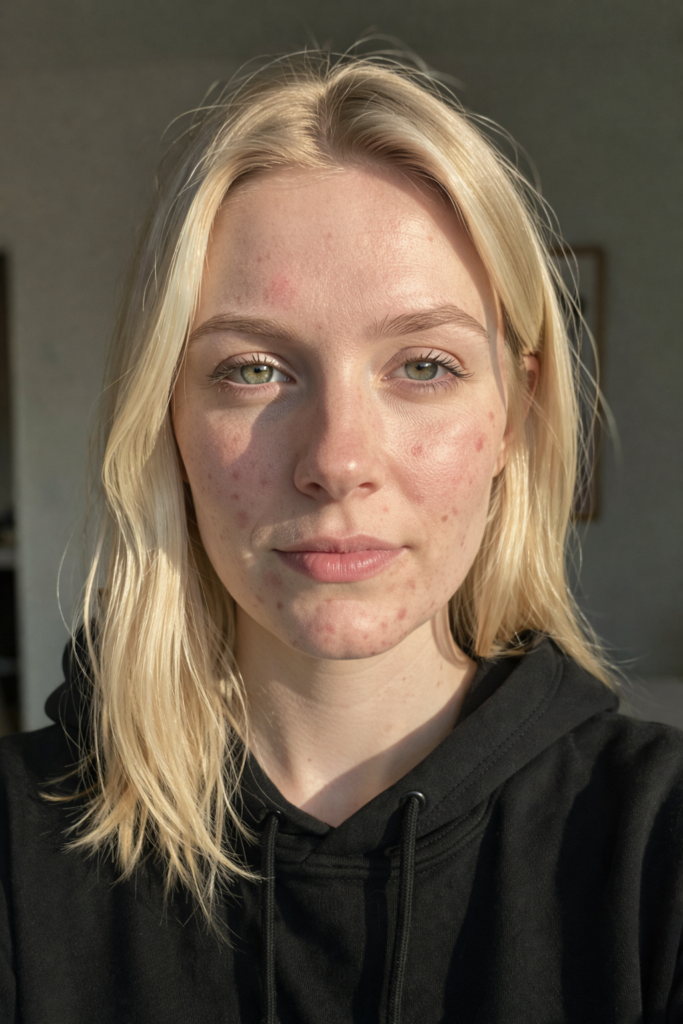
- Week 1: Her skin doesn’t look dramatically different yet, but it feels different. Tightness after cleansing reduces, redness starts calming down, and your face holds hydration longer throughout the day. This is barrier stabilization beginning to happen.
- Week 2: Oil production looks more balanced, especially around the T-zone. Small dry patches soften, and makeup sits better because the surface texture is improving. She did not see “glass skin” yet—but she was seeing control.
- Week 3: This is where visible brightness kicks in. Dullness started fading, pores appear slightly more refined, and inflammation from active breakouts settles faster than usual. Consistency here is crucial—you don’t skip layers.
- Week 4: Texture changes become noticeable under natural light. Rough areas feel smoother to the touch, and post-acne marks begin looking lighter. Hydration levels stay stable from morning to night because your barrier is functioning better.
- Week 5: Her complexion started looking more even overall. That subtle bounce shows up—skin looks plumper, not oily. She’s using the same products as mentioned earlier, but now they’re working more efficiently because the barrier is stronger.
- Week 6: This is where everything comes together. Tone looks clearer, pores appear tighter, and the surface reflects light more evenly. It doesn’t look filtered or artificial—it looks healthy. And that steady, layered progress is exactly why a simple $50 routine ended up delivering results that looked far more expensive.
How to Recreate This Routine for Your Skin Type
You don’t copy her routine blindly—you adjust the structure to fit your skin’s behavior. If you’re oily or acne-prone, keep the low-pH cleanser and niacinamide consistent, choose a lightweight gel moisturizer with ceramides, and exfoliate twice weekly with a mild BHA to keep pores clear without over-drying.
If you have dry or barrier-damaged, layer your hydrating toner two to three times, prioritize snail mucin and centella for repair, and use a richer cream to prevent overnight water loss—skip frequent exfoliation until tightness fully resolves.
If your skin is combination, apply niacinamide mainly through the T-zone and use a balanced cream that hydrates without heaviness. Sensitive skin requires lower concentrations and slower introduction—add one product at a time and watch for reactivity before increasing frequency.
The framework stays the same: cleanse gently, hydrate deeply, support the barrier, control oil strategically, protect with sunscreen daily. You’re not chasing trends—you’re building a customized version of a system that already proved it can transform texture and glow in six consistent weeks.
New Posts

5 The Ordinary Products for Dry, Dull & Textured Skin